I know (I think?) what you’re thinking. Yellow cake? What’s the point? Chocolate is where it’s AT! I agree with you, but every once in a while you need some quality yellow cake in your life. Like on the 4th of July.

Because it just feels right. Is #merica just so 2013?


Since I wanted P to be able to eat some, I made it allergen friendly. As in, no wheat, gluten, dairy, nuts, or soy. The batter does contain eggs and I’m not sure if it would turn out without them but if anyone wants to give it a shot with flax meal or chia seeds, by all means please do. I realize there are boxed cake mixes out there, but I wanted a cake free of gums and stuff, so I made my own.

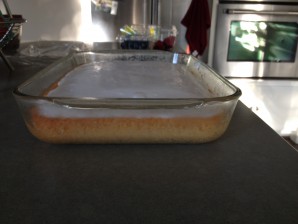
I made both the cake and frosting a few days in advance and stored them in the fridge. Before frosting the cake, I let the icing sit on the counter to get closer to room temp – not too warm though, just enough to spread more easily. Then it went back in the fridge until the 4th. I took it out of the fridge ~15 minutes in advance of serving.

Both the cake and frosting involve coconut oil so we all know the solid state that reaches in cooler temps.

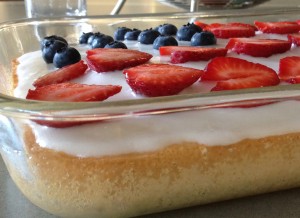
Frosted and berried and BAM! Land of the free, home of the brave.

Turns out I have some crafty inclinations in me after all. 

Yellow Cake [gluten free, dairy free, nut free, soy free]
Ingredients:
- 1/4 cup coconut flour
- 2 3/4 cup all purpose gluten free flour (I used TJ’s – it doesn’t have guar or xanthan gum)
- 1 2/3 cup sugar
- 1 tbsp baking powder
- 3/4 tsp salt
- 3/4 cup coconut oil, softened (or almost all the way melted)
- 1/4 cup vegetable oil
- 4 eggs
- 1 can light coconut milk (~1 2/3 cups)
- 2 tsp vanilla
Pre-heat oven to 350 degrees F.
Mix dry ingredients (flours, sugar, baking powder, salt) until uniformly mixed. Add in wet ingredients and mix thoroughly, whipping it til it’s silky smooth.
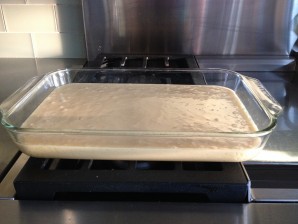
Pour into greased baking pan (I used a 9×13 pyrex). Bake for 30 minutes at 350 degrees F or until a toothpick comes out of the center clean.
Let cool on counter before frosting.
For the frosting I had to make a hack version of what I normally do. Ordinarily, I would use the solid portion of a can of full fat coconut milk (chilled in the fridge over night so it’s separated and easy to scoop apart from the coconut water), but I was all out. So instead I combined coconut milk and oil to create a “cream”. It’s not a whipped frosting, but rather, a thin sweet layer that nicely accompanies the cake. I thought it was good enough to share the recipe.
Vanilla Coconut Frosting [vegan, gluten free, dairy free, nut free, soy free]
Ingredients:
- 1/4 cup coconut oil
- 1/4 cup light coconut milk
- 1/4 cup powdered sugar
Directions:
Whip everything together until no lumps remain (I used a hand mixer). Refrigerate for >2 hours. Remove from fridge and give it a quick stir a few minutes before frosting.
Top with berries for the American flag look. Or go crazy with sprinkles.

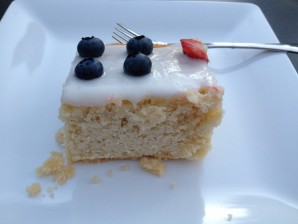
This cake is humble enough to be an everyday cake, but can be fancied up for special occasions too. And even though it’s not from a box, it’s still not terribly labor intensive. It’s not quite as fluffy as traditional cake – it’s a bit more dense (although I hesitate to use that word since it implies a heaviness, which was definitely not present). I’d say it’s more like a shortcake. It gets softer the warmer it gets – thanks to the coconut oil. And everyone seemed to like it, so I think it’s a winner.

Notes: For a white (not yellow) cake, you could use 8 egg whites instead of 4 eggs. If you’re anal (cough, cough) you may consider buying extra berries so you can find ones that are uniform in size. Don’t be alarmed by the liquid-y nature of the batter (I was) – I promise it will be okay.


I hope this is helpful for all the allergy peeps, but honestly, it’s a delicious cake that I would eat it over and over, even though I tolerate many things my son cannot.
I actually much prefer yellow cake to chocolate. I’m weird.
I made this cake and my whole family LOVED it! Thanks for sharing the 4th with us
Pingback: Making a three cake – Hungry Hungry Hippie